[How-To]: Setup HP Deskjet 2050 using Airport Express and Windows XP

I decided to buy Airport Extreme base station. I was looking forward to being able to share my HP Deskjet 2050 off the USB port but didn't know if my old XP PC would be able to use it. After much searching, I found these instructions and all is well:
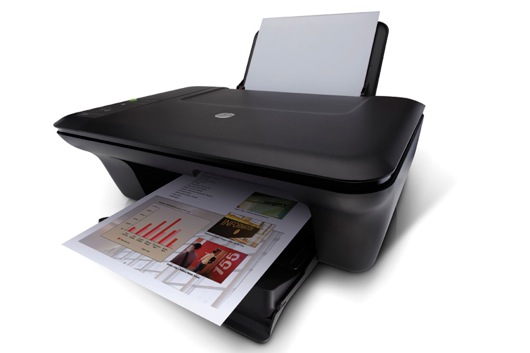
  1. Make sure the printer is recognised by the base station.
  2. Select 'Add a new printer' in Windows
  3. Select 'Local Printer' in the dialog box (auto detect and install should be off), click next.
  4. Choose 'Create a new port' and "Standard TCP/IP Port'. Click next.
  5. For the printer IP address, enter the address of the base station ie. 192.169.0.112. The port name will be filled automatically. Click next.
  6. For the device type, choose 'Hewlet Packard Jet Direct', then click Finish.
  7. Choose your printer from the list and follow the rest of the prompts to install and configure the driver.
HP-Deskjet-2050-2010-12-7-09-35.jpg


Continue Reading...

Foursquare Better than Garmin GPS

  • There are times when my Garmin GPS unable to find the right address.
  • Or there are times when you didn't bring your GPS along and you are "lost".
  • This is when Foursquare come to the rescue.
  • For example, I wanted to find CWA (CIMB Wealth Advisor)'s location but somehow it was not registered in the Garmin although it can take me to Damansara Utama.
  • When I was at Damanasara Utama, I was quite lost to find the road.
  • Using Foursquare, I located CWA's location (Search in "Places")


  • Click "More Info" to see its location on a Map.


  • Click the RED dot to open the iPhone's Map app.


  • By clicking the "Directions", it will give the route from your existing location to the destination.


  • Follow the route. Voila!


- Posted using BlogPress from my iPhone
Continue Reading...

DIY - Wireless HOME Networking

STEP 1 - Get a good Internet connection. I used TM's Unifi VIP10 package i.e. 10 Mbps


STEP 2 - Create a Home WiFi. Using DLink wireless router which have its own WiFi SSID, I connect a Time Capsule using Ethernet to the Dlink router with another new SSID. Time Capsule is configured in a Bridge Mode.


STEP 3 - Create a Network Attached Storage wirelessly. I connected 2 TB of WD USB Drives to the USB port of my Time Capsule. The Time Capsule serves as my Time Machine backup (500GB) and the WD drives serves as home storage.


STEP 4 - Create a Home IPTV solution. Using my Apple TV which is connected thru HDMI to my TV, I can now wirelessly stream music and movies to the Apple TV. It can stream in real time or stored in ATV itself. With shared iTunes library, I can also make 3 other Macbooks in my house to share their own personal library.


STEP 5 - Create a wireless printer. Using my cheap HP Deskjet 5020 Series printer. I connected it using my recently purchased Airport Express. Now, we can print wirelessly anywhere from the house.


STEP 6 - Stream music from anywhere in the house. WIth a speaker attached to my Airport Express, anyone with an iTunes can now stream their own favorite music to the speaker.
Continue Reading...

Bought an Airport Express 802.11n WiFi

  • Today, I thought of getting a networking solution for my USB HDDs. I figured an Airport Express would be able to connect via its USB interface and make itself recognized on my Home network.
  • The Airport Express seems to be out of stock almost in every Mac reseller shops (tried MacStudio and Low Yat and Berjaya, and also called all Machines outlet but to no avail). 
  • Finally called Epicentre and lucky enough they said there is stock available. Thus, took a drive to Pavillion to purchase the RM 369 Airport Extreme.
  • The first I was trying to get it connected to my WiFi network. Using cable on Bridge Mode is quite easy and seamless. 
  • However, I have dificulty in getting the WDS to work (using main and remote mode). I configured my Time Capsule which is connected in Bridge Mode to be set as WDS (main) and the Airport Express (remote WDS) but it doesnt work.
  • Finally, I tried the "Join the Wireless Network" setting and voila! It connects to one of the WiFi APs which I have set in my house.
  • Streaming the audio the AE is quite easy but unfortunately I am unable to recognize any USB drives which are connected to its USB.
  • A Google search showed that ONLY Airport EXTREME BS will be able to connect USB drives while Airport EXPRESS is NOT! Damn....!! There goes one of my feature to make a NAS of my USB drives.


  • Finally, I connect all my Western Digital HDDs (2 units of 1TB drives) to the Time Capsule directly.
  • And made my AE part of the Home Network....
Continue Reading...

[How-To]: Configure Airport Express with Hotel Ethernet

Step by step to configure the AirPort Express in bridge mode is outlined below. Note that you will need to use the AirPort Utility application for this. On your Mac computer, it's located as follows:

Macintosh HD > Applications > Utilities > AirPort Utility.

Use AirPort Utility - Manual Setup to check some of your settings on the Express.

  • Click the Wireless tab below the row of icons
  • Wireless Mode = Create a wireless network
  • Wireless Network Name = Your choice
  • Radio Mode = 802.11n (802.11b/g comatible)
  • Wireless Security = WPA2 Personal or WPA/WPA2 Personal
  • Wireless Password = Your choice
  • Verify Password
Click the Internet icon
  • Connect Using = Ethernet
  • Connection Sharing = Off (Bridge Mode)
  • Update to save settings
Power down the Express and connect it to the hotel's ethernet jack using an ethernet cable.
Power up the Express
Open your browser to see if the hotel's internet page will appear so you can agree to terms, pay fees, etc.
Once you agree, you should be on the internet and wireless should be working. 
Continue Reading...

[How-To]: Save SHSH Blobs Directly From iPhone, iPad, iPod touch Using iSHSHit

  1. I found out that this is a simpler way to save your SHSH. But you need to Jailbreak your iPhone first. 
  2. iSHSHit is a new Cydia app that is an alternative to Tiny Umbrella. Thus, you don't need a computer to save the SHSH blobs.
  3. It lets you save and backup SHSH blobs directly off your iOS device. It also has the original functionality of being able to send your saved SHSH blobs via email, which is a very handy feature. It also automatically uses the Cydia On-File service, meaning that your SHSH blobs will also be saved on the Cydia servers.
  4. iSHSHit is very straight forward and simple to use. After installing it from Cydia, just click on the save icon at the top right corner, and wait for it to save your SHSH blobs to Cydia. Once your SHSH blob has been saved, you will get a message as can be seen in the screenshots below.
  5. In case you don’t already know, saving SHSH blobs have proved to be very useful for downgrading to older firmwares. Recent tweets from Comex suggests that they will also be required for untethered jailbreaks in future.


Source: HERE
Continue Reading...

Its on the way!

Finally, today received an email today from the seller mentioned that the order (VTA7013) has been shipped and I have received the tracking number.


(Not disclosed)
Billing Information Received 
AMPANG, MY
12/03/2010
(Not disclosed)
Package
EXPEDITED
3.80 Lbs
Continue Reading...